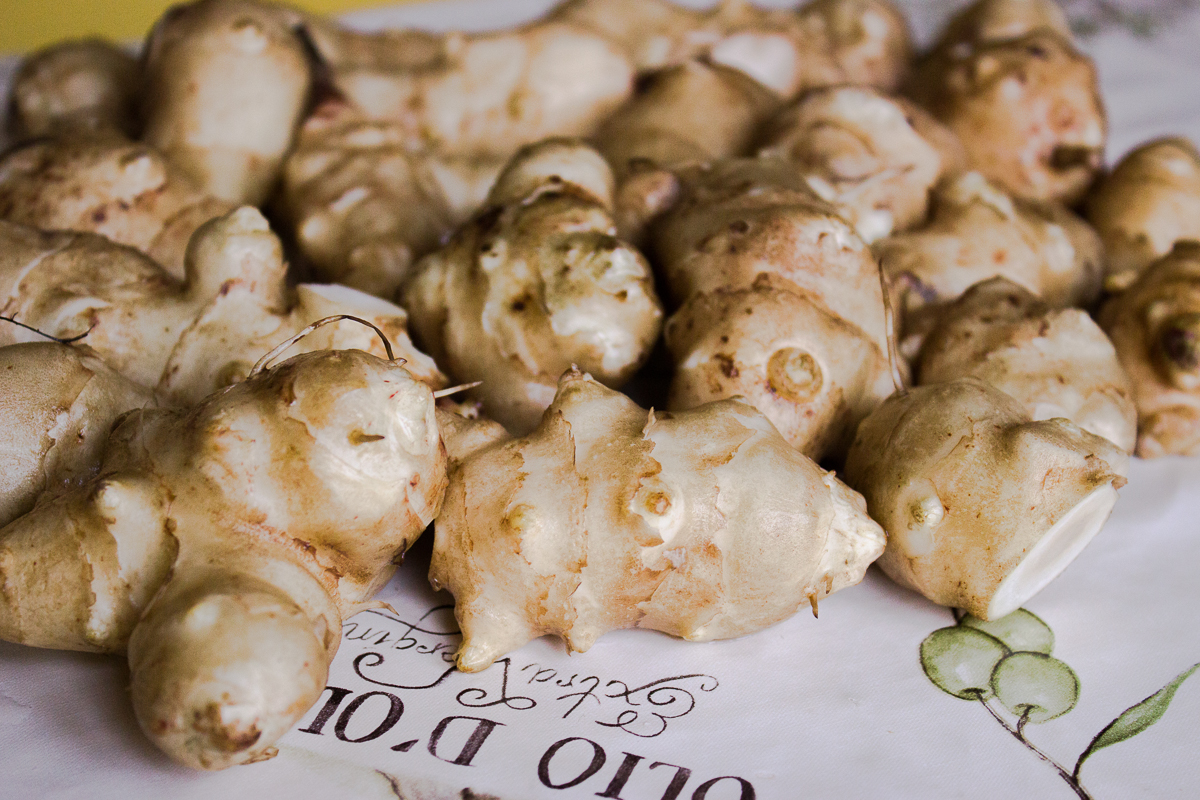
Since the previous snack experiment went well and the sweet potato crisps pretty much got devoured the same evening, I decided to give it a go with some other vegetables. I happened to have a kilo of Jerusalem artichokes around and assumed they would make lovely crispy treats as well. The name in English was a surprise to me, I expected it to be something similar to the Estonian one. To us, these bumpy little roots are “earth pears” (maapirn), and apparently the Dutch have the same principle for naming them (aardpeer). But no, English has to be special yet again. It’s like that pineapple saga where most countries named it something like ananas and in English it’s the nonsensical pineapple instead.
Anyway, enough of the name. The only thing you really need to remember about Jerusalem artichokes is that they are awesome. They are not starchy like potatoes, so at least for me they seem quite a bit lighter on the stomach. They get a delightful light nutty taste when baked and they’re even good when eaten raw! That last part depends on your luck though – I’ve had amazing light and crunchy ones and also some that tasted like I was eating dirt. Let’s assume you have the good kind. Onwards to the recipe!
Grab your muddy little Jerusalem artichokes and give them a good scrub. Since I knew exactly where mine were from (grandma’s garden), how they were grown (they decided to grow on their own) and how many chemicals had been used to grow these (none), I didn’t bother with peeling. They are incredibly annoying to peel anyway due to their bumpy texture. So if you’re certain yours are nice little eco-roots, just wash them properly with a dish brush and set them aside. You may need to cut off bigger “branches” so you can get the parts between these and the main root clean as well.
Once you’re done with washing, make the coating mixture (this was enough for my kilo of slices):
2 tbsp oil (I used olive oil, but I assume they would be lovely with coconut oil as well!)
1 tbsp lemon juice
salt
herbsThe lemon juice gives a nice taste and keeps the crisps from turning too brown from contact with air. For herbs, I used a dried mixture of rosemary, basil, thyme and oregano. Feel free to add some pepper as well, if that’s to your liking. Mix this together and be ready to spoon this on the slices you’ll be making in the next step.
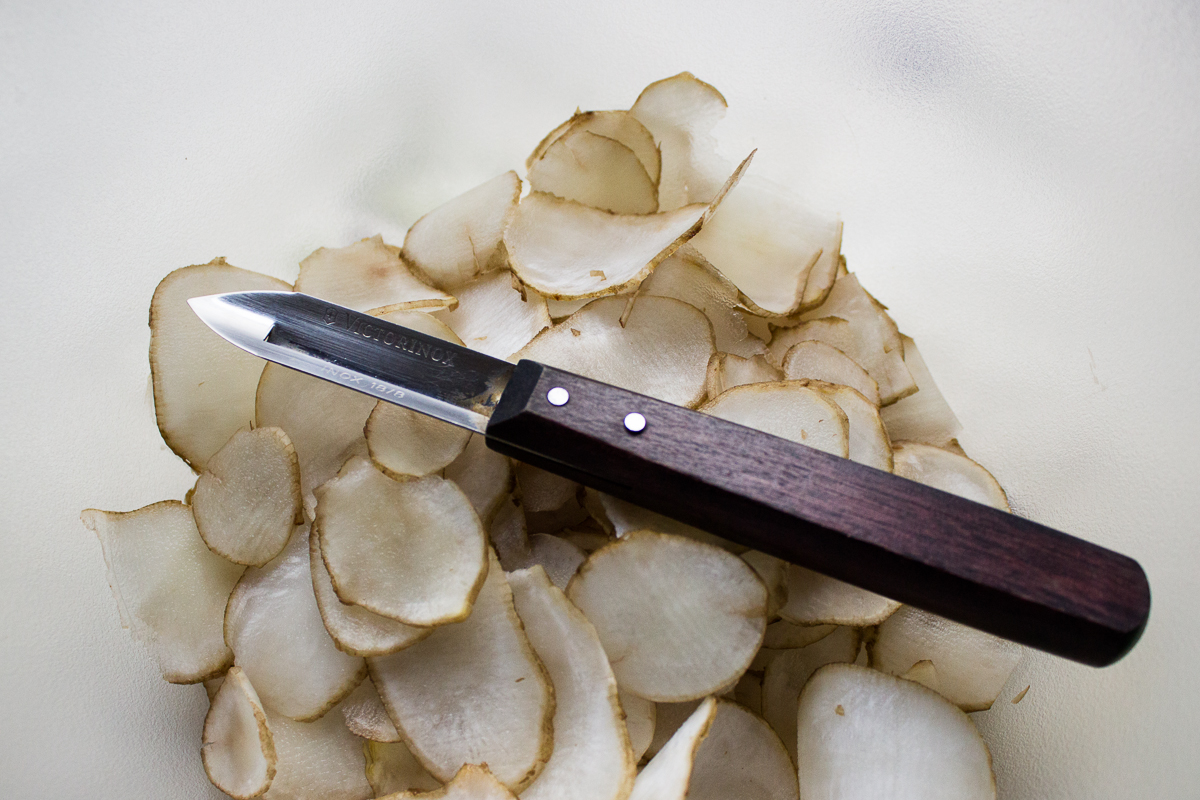
Now start slicing. Since I have no slicer thin enough (they have to be superthin to turn out crispy!), I used a potato peeler. Sat there for two hours slicing that kilo of roots. That’s okay though, since I had put a good TV-series on. Instead of just killing time and watching something, I was actually doing something useful at the same time!
This is the peeler I used. I’ve tried several different ones, but so far nothing has beaten this wonderful peeler from Victorinox. My boyfriend can’t use it since he is left-handed, so he uses some kind of a death contraption that all Dutch people are used to. I never warmed up to his weird peeling utensil (it moves around while peeling!), so I’m staying true to my choice.
Every now and then spoon some oil and lemon mixture in the bowl of slices. You can stir as well to distribute it more evenly, but since Jerusalem artichokes are so crunchy and break stupidly easily when sliced, you may end up with a bunch of little broken off slice tips. The more evenly you spread the mixture, the less they will turn brown though… so find your own balance for that. I chose to do some gentle stirring once there was a bigger pile of slices.
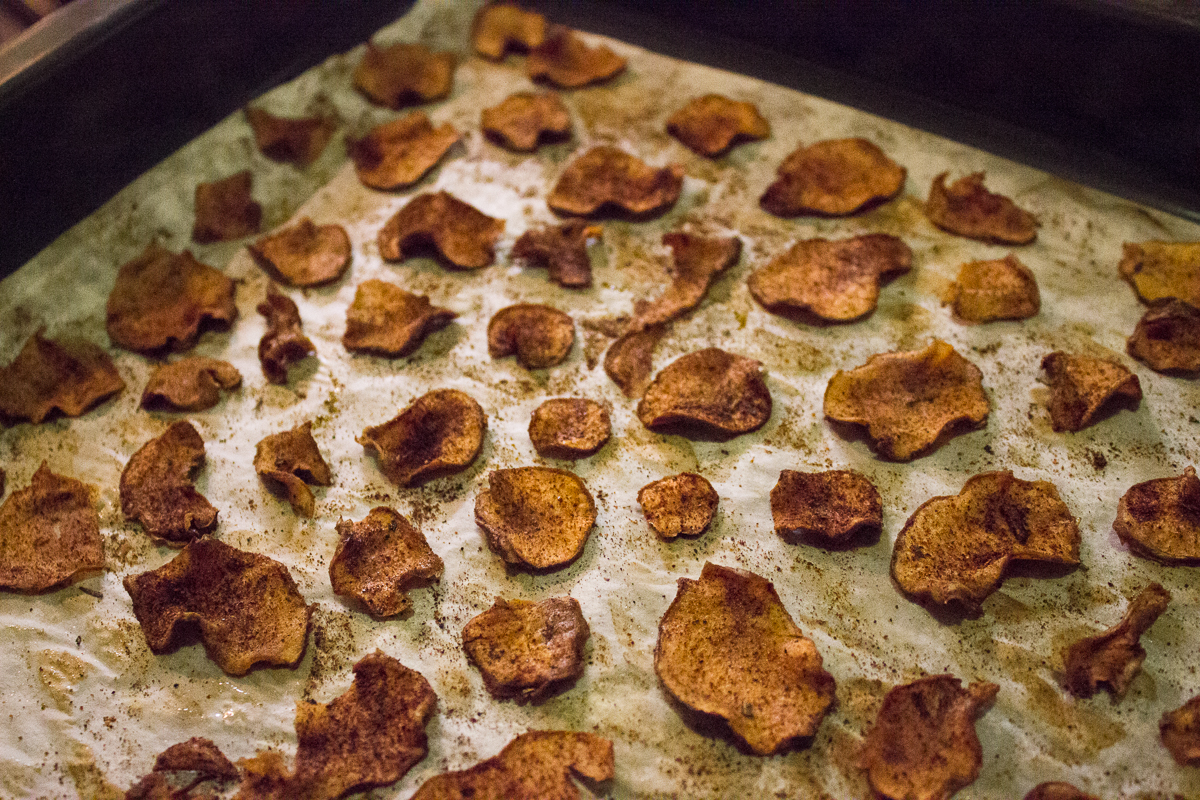
Everything is sliced? Great, but don’t rest your tired hands yet. Take all the baking pans you have and cover them with a sheet of baking paper. Now comes the fun part – dig into the bowl, grab a handful of oily slices and start placing them on your baking pan. Put them as close to each other as possible – they shrink like mad. I ended up covering six pans (I have only three, so I had to finish one batch and refill the pans). Had I put them more apart, six pans would not have been enough. While doing this, just hope nobody calls you. It’s kind of difficult to pick up the phone if you’re oily up to your elbows. I had to do a mad dash to the sink and lather everything in soap twice to get to the phone.
I put my crisps in a 130°C (266°F) oven for 15 minutes at first and then kept checking up on them every five minutes. Tiny crisps will be done quite fast, so be ready to take a pan out at a random time to pick crispy ones off and pluck them in a bowl / your mouth. Once you’re done with that pan and put it back in, some on another pan are probably ready so you can continue with that. Bigger ones took up to 25 minutes for me. To make sure you won’t forget the oven and turn your awesome crisps into thin coal slices, I recommend just sitting next to the oven with a timer and a book.
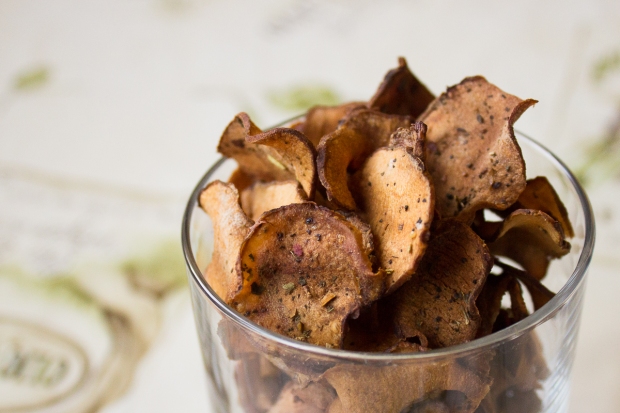
Following my boyfriend’s advice, I also made some with paprika powder and another pan with oven potato flavouring. He’s been very supportive with my quest for new healthy foods, so I was happy to make some stuff specially for him. These are better and healthier than potato crisps from the store anyway!
All done! Enjoy the crispy goodness and then go out to get more veggies for snacks – don’t expect to have anything left for the next day! (Unless you’re sneaky like me and pack two boxes away in the back of a shelf immediately.)
I submitted this recipe to the Virtual Vegan Potluck to share it with more people and find some new recipes myself as well!