Making desserts is tricky if you’re not allowed to use eggs, sugar, wheat flour nor any dairy products. Fortunately I have already found some alternatives, but a lot of them require “nut butter of your choice”. Since my only allowed nuts for now are almonds, it wasn’t too difficult to choose what to make. My first attempt had quite nice results, so I invited a friend over to make another batch together – I wanted her to witness the magic of turning just plain nuts into something so wonderfully creamy. Unfortunately I missed one step and ended up with kind of damp crumbs that refused to turn into butter. I tried again today and fortunately everything worked like a charm!
So, gather your nuts of choice (you really don’t have to make almond butter if you’re a fan of hazelnuts for example) and get ready for this one-ingredient recipe!
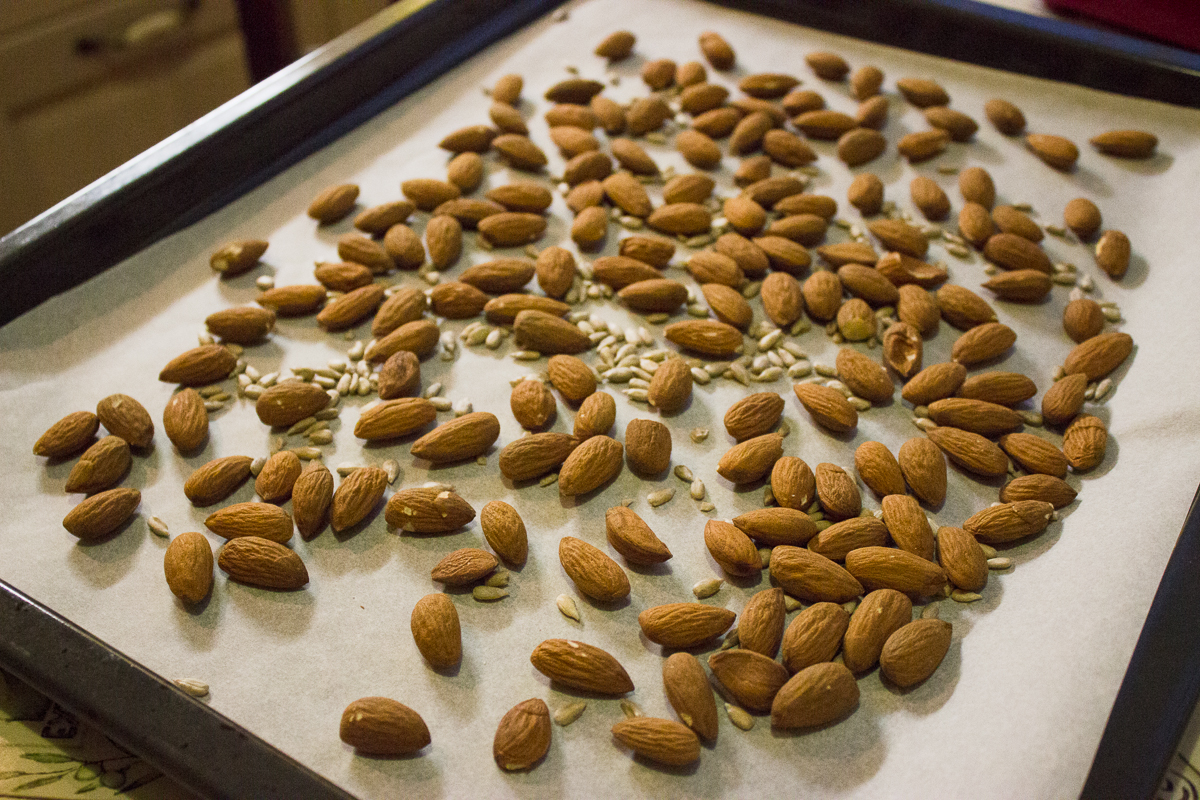
I took a cup of almonds and decided to add a small handful of sunflower seeds just because I can. Take whichever nuts you prefer and then prepare a baking pan for a short roasting. Put some baking paper on the pan, spread the nuts and/or seeds and put them in the oven for about 12-15 minutes at 130°C (266°F).
You can stir them once or twice if they start getting too brown on top. I shook them around once, just in case. Once they’re out of the oven, give them five minutes to cool down. Don’t stretch the wait much longer than that!
Plop the slightly cooled nuts in a blender (or a food processor). They should not burn your hands anymore, but also not be entirely cool yet. Them being a bit warm really helps the process along. When I screwed up the previous attempt, roasting was the step I skipped. Unfortunately my blender cannot handle making nut butter without that step. Also, the blender has to be kind of powerful to handle processing nuts without overheating like mad. I alternated between highest and second highest speeds.
Very quickly, the nuts should turn into dry powder. Congratulations, the first step is done! Peek in and enjoy the smell of roasted nuts. Also, grab your rubber spatula or some other nice utensil and push the crumbs down a bit. There’s no use in processing them if half the nuts are climbing up the walls. You’ll probably have to stop, push the mixture down and restart a lot of times, if your food processor works similarly to mine.
Keep on processing and your nut crumbs should soon start clumping up a little bit. See those tiny balls of crumbs on top? That is very good, keep on going. Take care of your blender / food processor though, don’t let it overheat! It’s completely normal for the bowl to feel warm, you did put things from the oven in it and the blender is warming them a bit as well. It is not good however if the rest of the machine starts feeling heated and/or there’s a burning smell in the air. Just give your machine a bit of a rest and then continue.
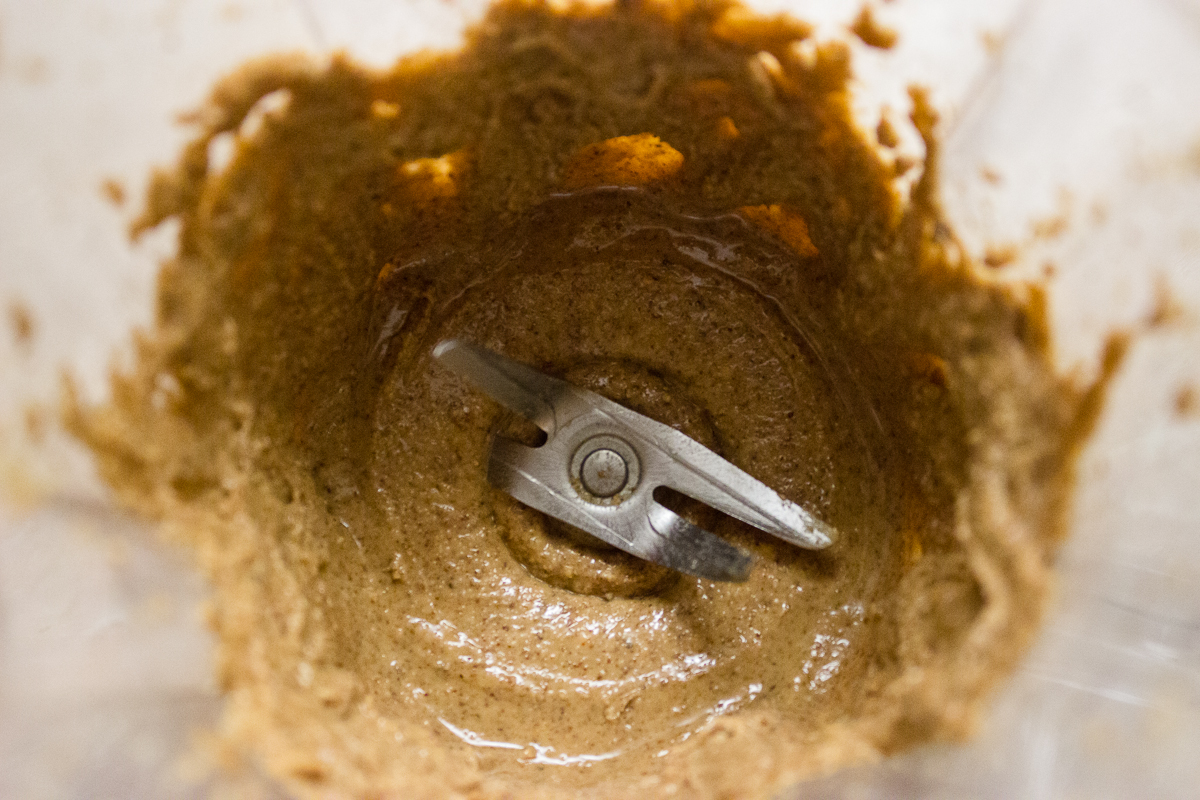
Getting to this step will take time, but in about 7-8 minutes from when I started, the crumbly mess started looking like this. That means the processor is finally getting some oils out of the nuts.
At some point I started pouring/scraping the mixture out of my blender to break the bigger pieces apart and shake it around a bit. Otherwise the more damp crumbs kept gathering on the bottom and getting oils whipped out of them while the rest stayed dry on top. This step may not be necessary a different machine, but for mine it really helped.
This is the part where I started to get really excited. It’s looking like nut butter! It’s all damp and the processor is actually swirling it all around instead of keeping the oilier parts on the bottom and shoving dry crumbs up. This is not the end yet though, keep on going!
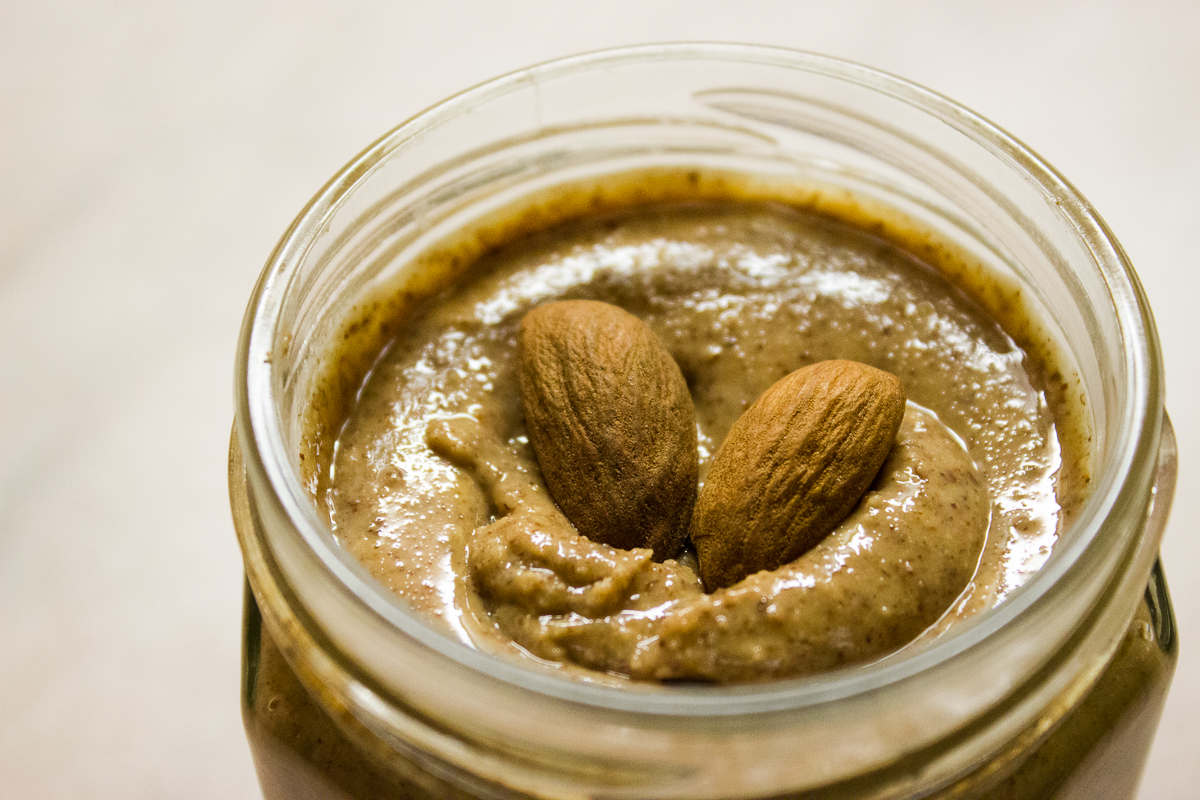
THIS is where you can stop. It’s all wonderfully liquid and the blender keeps pulsing half the mixture up the walls in splashes. If you wish to add any flavour, do it now. I wanted to add a bit of sea salt and perhaps a little bit of sweetener (maple syrup or agave syrup, since I’m not allowed to have cane sugar). Unfortunately I was way too excited that everything turned out the way I wanted it to, so I completely forgot about that step. I just scooped everything into a jar and danced around with joy.
And there you have it. Beautiful homemade almond butter. I can guarantee you that this is better than what you could buy in a shop – you know exactly what is in it and you can flavour it however you wish. Want vanilla butter? Chuck in some powdered vanilla bean! Want a chocolatey one? Add cocoa powder! Need it to be sweeter? Bring out your awesome syrups (or just use sugar if that’s what you like). Go ahead and give it a go! (And let me know how it worked for you :))