Beet Patties

Meat & veggie burgers

Sometimes I get a really bad craving for the kind of burgers my mum makes. Some minced meat and a LOT of veggies! Unfortunately I wasn’t able to use mum’s actual recipe since that called for some white bread and eggs, neither of which is allowed for me. So I modified mum’s recipe, omitting the bread and replacing eggs with a flax seeds + water mixture. When prepared in advance, ground flax seeds mixed with water give a very egg-like texture. Perfect for those who can’t handle eggs!

These patties have a high amount of veggies, but they do also include meat. (Though according to my boyfriend, not nearly enough.) I can’t have a lot of animal products due to health reasons, but apparently all meats are okay for me. I will make some veggie-only patties at some later point and I’ll upload that recipe for people who don’t eat any meat. This time it’s the meat version :)

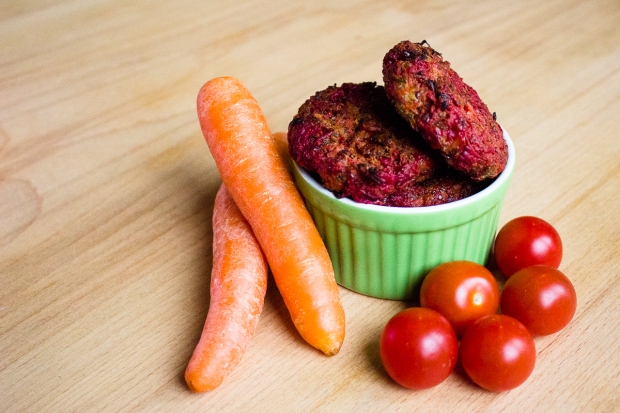
Meat&veggie burgers (15 pc)

300 g minced meat
250 g carrots
150 g beets
150 g onions (about two average sized ones)
3 garlic cloves
2 eggs or egg replacement
1.25 tsp salt
handful of parsley
some pepper

Beet Patties

In case you’re using flax “eggs”, make them now. You need two tablespoons of ground flax seeds and six tablespoons of water, mix them together and put in the fridge to wait for the right time. For a longer and nicer explanation of making flax eggs, check this post from Bonzai Aphrodite!

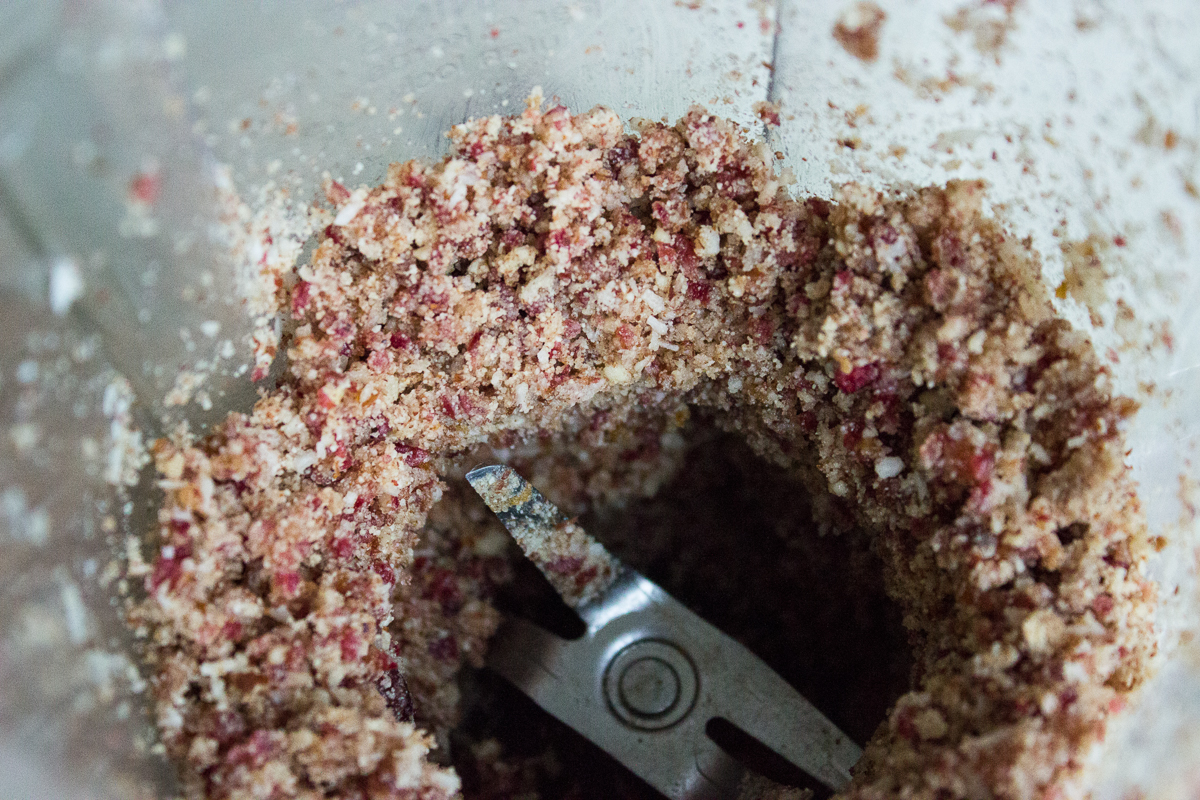
Now set up your food processor or grab your grater. Grate all carrots, beets, onions and garlic cloves. This will form a nice colourful mess in your bowl. Looking good!

Beet Patties

Add the minced meat with salt and pepper. I prefer using pork, makes for juicier patties. Mix well, squishing bigger blobs of meat with a spoon. Now mix in the (flax) eggs and parsley. I always keep some chopped&frozen parsley in the freezer for occasions such as this. During summertime when parsley is in abundance, I chop up a ton and store it for using during the rest of the year.

Beet Patties

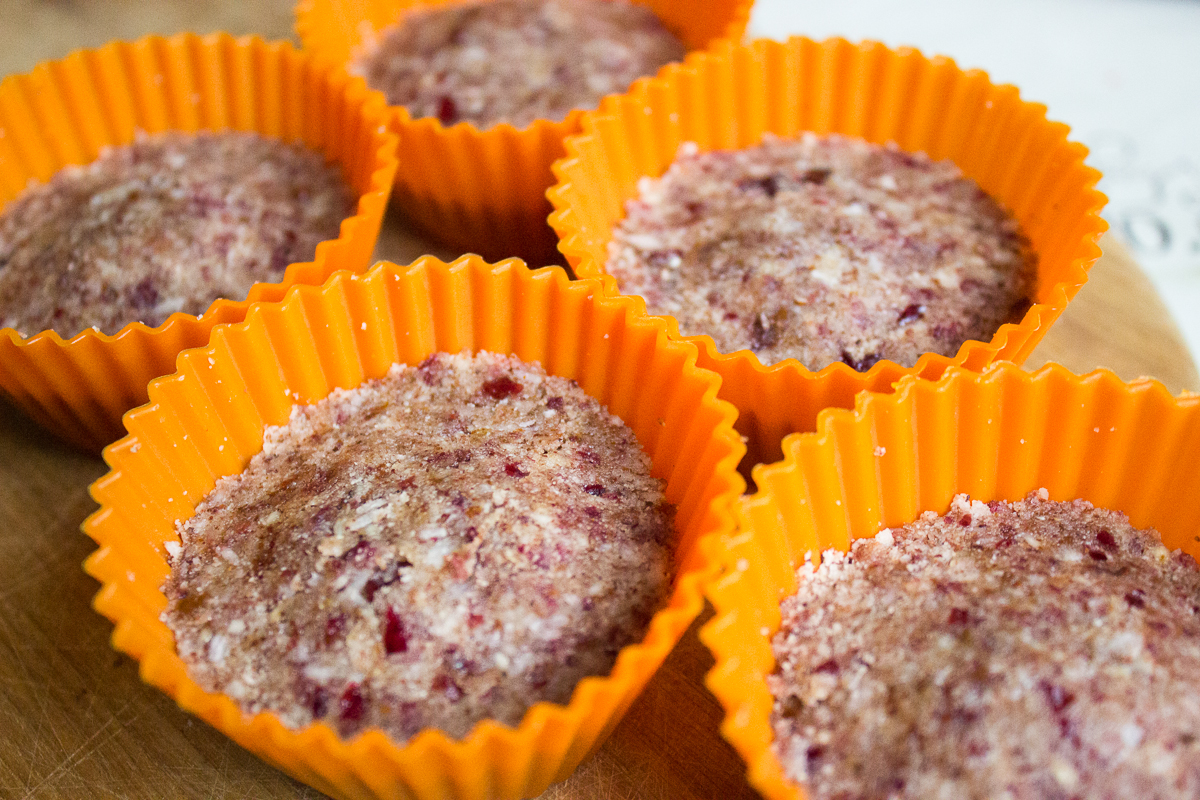
Once everything is well mixed, start heating the oven to 200°C (392°F) . While the oven is warming up, you can form little round or oval burgers with your hands. I took a big heaped tablespoon of the mixture for each one. Place them on a baking pan that is covered with baking foil, unless you’re willing to scrape the pan later.

Beet Patties

Heat the oven to 200°C (392°F) and put the burgers in for 20 minutes. Then open the oven, take a nice deep breath and enjoy the smell. Flip the burgers and put them in for another six minutes so the other side gets slightly browned as well. The flipping may be tricky since the high veggie content makes the patties rather damp. Just do it carefully with a big spatula and try not to break the tinfoil. I wasn’t careful enough and broke it in two places. Made for a messy pan and annoying cleaning later.

PS. Sorry for the terrible photos! It’s getting close to christmas and in Estonia that means getting barely any light during the day. The day I was making these, I didn’t see the sun even once!

Beet Patties

Serve with fresh salad and perhaps a dollop of cream cheese. Goat cheese works wonderfully here! Pack leftovers in an airtight box and place in the fridge. The burgers are also lovely when cooled down, though I prefer to heat mine a bit before eating.

Raw Chocolate Cupcakes

Raw chocolate cupcakes

Sometimes you just want to have chocolate with chocolate and perhaps some chocolate on the side. If that’s you right now, then you’re in luck as this recipe is exactly for that occasion! No faffing around with berries and bananas, this one tastes of pure chocolate. Fortunately everything in this recipe is healthy, so unless you decide to devour all of them by yourself in one day, they should do you no harm.

Raw chocolate cupcakes

(Makes 6-7 medium cupcakes.)

Cupcake base:
60 g dates
50 g almonds
40 g almond meal (either just flour or pulp from making almond milk)
25 g coconut flour
3 tbsp cacao powder
0.5 tbsp pure vanilla powder
some coconut oil + almond milk (the latter can be replaced with water if needed)

Raw Chocolate Cupcakes

Blend the almonds and dates until they form small crumbs. Then add all other ingredients with about 1 tbsp of coconut oil and as much almond milk (or water) as is needed to blend everything into a slightly moist crumbly mixture. If you just made almond milk and are now using wet meal from that, you probably won’t need any milk. Don’t go for the same texture as you get in muffin dough – remember, these are raw cakes! So no need to make the dough overly sticky or liquid, it’s ready as long as it stays together with a bit of pushing. So get a spoon and squish a bit of the mixture against the side of the blender – if it sticks together, it’s done!

Raw Chocolate Cupcakes

Now grab muffin forms and distribute the mixture between 7-8 of them. I always make one more than the recipe suggests so the frosting to base ratio is higher. It makes the cupcakes so much “juicier” to eat! After distributing, push the mixture down with a spoon and place the cupcake bases in the freezer while you make the frosting. The freezer step is not compulsory, but it does make it easier to get the cakes out of the forms!

Chocolate frosting:
3 ripe avocadoes
3 tbsp cacao powder
2 tbsp honey (or agave syrup for a vegan option)

Raw Chocolate Cupcakes

Peel and chop your avocadoes, then blend them with cacao powder and sweetener. You can probably get by with two avocadoes if you don’t want mountains of frosting. As it happens, I do want mountains, so I made a bigger portion. I even had some left over to mix with my goat milk ice cream later! (Yes, goat dairy is the only kind I can have. I’m getting used to the taste :))

You may want to use a hand blender for making the frosting. I tried in my trusty blender, but it kept leaving green chunks and that’s definitely not what you want in a chocolate frosting. So I scooped everything out (just like last time) and used a hand blender, it made the frosting nice and shiny. When you’re done, spoon it into a piping bag. Have none? You can just spoon the mixture on the cupcakes for a different look.

Raw Chocolate Cupcakes

Pipe the frosting on the cupcakes and decorate as desired. I used cacao nibs for some extra chocolate. One cupcake got special silver decorations as well, since this one went to my grandma for her birthday. She asked everyone not to bring anything, so I was a rebel and brought a tiny cake just for her. After all, could you say “no” to a birthday cake like this?

Vanilla Almond Coconut Butter

Homemade almond-coconut butter with vanilla and honey

I may have just come up with the best thing in the world. Seriously, it’s so tasty that I was struggling with spooning the nut butter into a jar – half of it miraculously disappeared on its way there. Who am I kidding – a big portion went missing during making the butter already, not to mention when it was actually done and ready to be stored.

Since my almond butter turned out well, but I forgot to put any sweeteners or other flavours in it, I decided to go for something more dessert-y this time. And boy was that a good idea! I do love the taste of pure almond butter, but sometimes you just need something sweet. And this hit the sweet spot so perfectly that I had to share the recipe with you now, even though I had two-three other things in queue before this.

Almond-coconut butter with vanilla and honey

150 g / 250 ml almonds
60 g / 150 ml coconut flakes
1 tbsp honey (replace it with a liquid sweetener if you want vegan nut butter)
1 tbsp coconut oil
0.25 tsp pure vanilla powder

Vanilla Almond Coconut Butter

Gather all the ingredients and perhaps a book (you’ll be in the kitchen for a while). If you’re not bothered with keeping the butter raw, you can make the process a bit easier for your blender and roast the almonds first. Put them on an oven tray with baking paper and roast them at 130°C (266°F) for about 15 minutes. Then let them cool for five minutes so they are not piping hot anymore, but not cold either. The heat will help the blender to get the oils out of almonds.

Vanilla Almond Coconut Butter

Almonds and coconut flakes go in the blender / food processor now. I used the highest and second highest speeds and blasted the nuts into flour. It already started smelling amazing at that step! But trust me, it will get SO much better as you continue.

Vanilla Almond Coconut Butter

If you continue processing the flour for long enough it will start clumping at some point. Study this photo and remember what it looks like, because you’ll be staring at this wet-sand-like mixture in your blender for a while. Process for a few minutes, stop the machine, scrape the mixture down from the sides (and break bigger pieces apart), restart the machine. This is why I recommended grabbing a book to entertain you.

Vanilla Almond Coconut Butter

Whoop, getting there! This is a step that I was stuck with for a longer time as well. It looks quite good already, but it refuses to transform to the next level for quite a while. Don’t give up though, just keep stopping and scraping and blending. I promise there will be magic happening at some point! By the way, don’t let your blender overheat – give it a break if you start smelling something that is not the delicious nut butter aroma coming from the blender. It’s probably your poor machine letting you know it will die if you don’t let it rest for a bit.

Vanilla Almond Coconut Butter

YES! Finally! It’s nut butter! If you don’t want to add anything, I’d recommend blending it for a bit longer so it’s even creamier. For this recipe’s purpose though, it’s ideal since we’ll have to continue for a bit after adding the last ingredients. Now you add vanilla powder, honey and coconut oil. If you happen to be vegan, this is where you replace honey with a liquid sweetener of choice. I can imagine this being super-delicious with maple syrup as well. And I guess agave syrup would also do the job, though the taste would be rather different.

Vanilla Almond Coconut Butter

Blend everything for a bit longer and you’ll end up with this creamy piece of paradise. Seriously, it’s THAT good. If you’re capable of restraining yourself, spoon this into a jar so you can use some later as well. If you’re like me, you’ll probably end up accidentally eating half of it there and then, making food noises all the way. (That’s what my bf calls the rather embarassing noises I tend to make when eating food that is too good to exist. Also called my crème brûlée noises.)

Vanilla Almond Coconut Butter

You can keep this at room temperature as it will probably not have any time to go off anyway – it will get devoured in two days tops! I managed to put a bit aside for a friend and stored that in the fridge so it’s out of sight. If you do that, you’ll have to take it out a bit before you want to start eating, since coconut oil will make it rather solid in the cold.

Now what are you waiting for? Go make this nut butter and tell me how it worked out for you! I want to know whether others would love this divine spread as much as I do. Omnomnom!

Raw Cranberry Cupcakes

Raw cranberry cupcakes with chocolate frosting

Ever since it started to look wintery here, I’ve been craving cranberries. That got me thinking – with all the fancy-looking raw cakes around, I hadn’t really seen many with berries and fruits that are a part of my everyday food. Since I had been wanting to come up with a cake that has a slightly more dough-like texture, I cleared the kitchen table and spread everything I wanted to use to see all possible ingredients. The first requirement for this recipe I wanted to come up with: instead of expensive foreign berries, I’d use local dried cranberries.

Raw Cranberry Cupcakes

My second requirement: it had to be a recipe that uses up some of my leftover almond meal from making milk the previous day. Right after finishing the almond milk, I spread the still wet pulp on a baking sheet and dried/toasted it at 130°C (266°F). It smelled and tasted divine after the roasting! So technically, due to using this roasted pulp, my cakes were not exactly going to be raw anymore. But by using dehydrated pulp or just plain almond flour, yours can be fully raw.

The third requirement was that instead of making use of all these fancy foreign sweeteners like maple syrup and agave syrup, I’d only add honey to these cakes. Since one of my relatives is a beekeeper, honey isn’t hard to come by in my household. (On a sidenote, if some Estonians reading this would love some good local honey, let me know!) So, equipped with cranberries, roasted almond pulp and honey, I made up these surprisingly easy cakes.

Raw cranberry cupcakes with chocolate frosting

Cupcake base:
70 g almond flour
30 g coconut flakes/shreds
30 g almonds
45 g dried cranberries
30 g dates
2 tsp honey
0.5 tsp cinnamon
1 tbsp almond milk (optional)

Raw Cranberry Cupcakes

Put almonds, coconut shreds, cranberries and dates in the blender with honey. Blend until everything has reached the desired size. Why use almonds at all if I’m already adding almond flour in the next step? This way I’ll add a bit of a crunch to the cupcakes and make the texture more interesting.

Raw Cranberry Cupcakes

Now add almond flour and cinnamon. If you just finished making almond milk and have wet pulp, you probably won’t need to add any liquid. For dry flour, I recommend a tablespoon of almond milk or even just cold water. This will make the mixture easier for the blender to handle and make the cupcakes more moist and like dough.

Raw Cranberry Cupcakes

Once everything is nicely mixed up, get your cupcake forms. I find silicone forms the easiest to use for raw cakes – you can just peel them off later without damaging the cupcakes. This recipe should make four full cupcakes. I made five just because I personally prefer having thinner cakes and more frosting, makes them juicier to eat. Put them in the freezer and get started on the frosting!

Chocolate frosting:
2 small ripe avocados
4 tbsp raw cacao powder
2 tbsp honey
1.5 tbsp cacao butter
0.5 tsp ginger powder
0.5 tsp cinnamon
a tiny bit of nutmeg powder

Raw Cranberry Cupcakes

Melt the cacao butter in a water bath, clean and slightly chop up the avocados and then put everything in a bowl. I first attempted the mixing in a blender, but I ended up with chunks of green showing. So I scooped everything into a different container and finished blending the frosting with a hand mixer. That worked a lot better, the mixture turned fluffy and nearly glossy.

Raw Cranberry Cupcakes

Now get your piping bag, put it in a glass so you’ll have your hands free (or have a friend hold it) and fill it with the cream. If you don’t have a piping bag, you can just spoon the frosting on the cupcakes. Might look less fancy, but it will taste just as good.

Raw Cranberry Cupcakes

If you’re like me and you lack a nozzle cover, filling the bag can be tricky (and very messy!). Fortunately I saw an elastic band around and improvised a solution – close the bag just above the nozzle with the elastic band! When you remove the band later, it can be used to fasten the bag on the other side.

Raw Cranberry Cupcakes

Pipe the frosting on the cupcakes and decorate as desired. I opted for coconut shreds and cranberries for colourful looks and a bit of cinnamon for the wonderful taste. By the way, if you’re worried that the frosting will taste like avocado, you can bury that fear now. I visited some friends with these cakes and they would never have guessed this was made of avocado if I hadn’t told them. (They would have found out through the blog later anyway.) You can of course taste the frosting while making it to make sure it’s exactly as you want. You should taste it anyway and add ingredients if needed, since this is what you’re going to get later as well. That’s one of the really good things about raw cakes, you know how it is going to taste when served later since there’s no baking to change the flavours.

Raw Cranberry Cupcakes

Grab a fork and enjoy! …or grab a spoon, since the cupcake base is so soft that it doesn’t need much digging to break.

Homemade Almond Milk

Homemade spiced almond milk

Switching from dairy to nut milks does not go easily for everyone. I bought every almond milk I could find in the shops and struggled with finishing the packages – they were all either too sweet or just weird tasting. I refused to give up though and in the end decided to make my own almond milk. And lo and behold! It was tasty! It does really help if you can make it entirely to your own liking, adding only the things you want. Goodbye store-bought milk, hello homemade deliciousness!

100 g almonds (dried weight)
500 ml cold water
flavourings to your liking (I used a bit of Himalayan salt, cinnamon and vanilla)
sweetener (I used coconut palm sugar)
/ If you want plain almond milk, use only almonds and water /

This recipe makes about half a litre of milk. If you want more, just double or triple the amounts!

Homemade Almond Milk

The making of the milk starts on the previous evening – put your almonds to soak with some water. This makes them nice and soft and also gets rid of some dirt on them. You can see the dark circle just above the water, that’s dried gunk from almonds. If you’re in a hurry, you can shorten the soaking time to six hours or so, but I do really recommend doing it overnight. Properly soaked almonds give a nicer result.

Homemade Almond Milk

When your almonds are nice and plump from soaking, rinse them and throw that old water away. Almonds and the half-litre of fresh cold water go in your blender now. Process them at high speed for around 20 seconds. I did mine for longer and ended up with that lovely foam. You can either sneakily eat it or let it disappear. Now you can take a break and read a bit or go check your Facebook or whatever. Leave the almonds to steep for 10 minutes so the milk can suck up more flavour.

Homemade Almond Milk

Now grab your cheesecloth or some other thick fabric that can be used to squeeze liquid out from the almond pulp. Mine is massive, because I was silly and bought a straining bag from the wine-making section in the supermarket (what, your supermarket doesn’t have one?). I did not expect it to be that huge! The ends actually extend underneath the big bowl in the photo. Oh well, I have a DIY-project waiting now – visit mum to use her sewing machine, cut the bag in two (or maybe even four?) pieces and sew them into smaller bags. Then I could even give some out in “make your own almond milk” kits to friends and family!

Anyway, put the bag over a bowl or a pitcher and pour your mixture in it. And I mean pour everything in it, you’ll have to get all that damp pulp out from the blender. Then just grab the straining bag and start squeezing liquid out. Take it as your morning exercise! My hands were actually hurting after this.

Homemade Almond Milk

Once all the squeezing is done, it’s time for flavourings! You can of course enjoy it as it is, but I decided to make it into more of a dessert drink. I sweetened the milk a bit with coconut palm sugar, added some oomph with pink Himalayan salt (only a little bit though!) and then went wild with cinnamon and vanilla. Since I can’t handle cane sugar, I couldn’t of course use that widely available vanilla sugar that pretty much everyone has at home. Fortunately I found this amazing jar of powdered vanilla bean during my trip to Finland.
PS. Sorry for the horrible photo, I was getting used to a new lense and managed to screw up the focus a bit.

Homemade Almond Milk

Add all desired flavourings and stir. If you wish, you can end your quest for almond milk here and now. If you want to have a slightly creamier version though, read on! I stumbled upon this wonderful tip in the One Ingredient Chef blog, you can turn your almond milk with watery consistence into something that is actually creamy! Apparently if you warm up the almond milk, it turns creamy at one point. If you’re not aiming for raw milk, this can be a good step to add to your milk-making process.

To see a longer explanation of making creamy almond milk, just click the link in the previous paragraph. Short version: divide your almond milk into two parts and heat one of them in a pot (constantly stirring) until the magic happens and your milk turns from watery to creamy. Then mix it with the half you put aside before and voilà! Why the dividing? Because sometimes the heating can give you a super-thick consistency that is not really milky anymore. Then you can thin it out with the watery stuff.

Homemade Almond Milk

And there you have it. Homemade almond milk with some spices. By the way, don’t throw the almond pulp away! You can dry it out and use it as flour in some other recipe. Or perhaps mix in some maple syrup and have a supertasty and filling treat. Don’t try to make almond butter with it though – I was silly enough to try and it just doesn’t work even after roasting it dry in the oven. There’s just not enough oils left in that pulp to turn it into butter. Anyway, I roasted my pulp dry and turned it into cupcakes – click to find the recipe!

Honey Coconut Cough Drops

Homemade honey coconut cough drops

The coughing season has officially started. This means it’s the perfect time to make some nice honey and coconut oil drops to soothe your throat! I found this little gem of a recipe at the Coconut Mama blog and wanted to try it immediately. With ingredients like that, what’s the worst that could happen? If for some reason it won’t help with coughing, at least I have some lovely treats for killing my sweet tooth if it starts whining again. The taste is wonderful, it’s sweet and creamy and coconutty. Next time I’ll probably add some ginger as well to give it a slightly sharper feel.

7 tbsp honey
7 tbsp coconut oil
0.5 tsp cinnamon
0.5 tsp turmeric powder

The original recipe did not call for turmeric, but I added it for some extra colour and that lovely taste. Also, it’s healthy! Anyway, to make the drops, you first whip the coconut oil (it should be at room temperature) and then add all the other ingredients and mix them together. I used my food processor for both whipping and mixing.

Honey Coconut Cough Drops

Once everything is nicely mixed up, take an ice cube tray and distribute the mixture kind of evenly. I used a tray with silicone bottoms, so you can just pop the drops out later by pushing. Once you’re done with this messy part, put the tray in the freezer for 20-30 minutes.

Honey Coconut Cough Drops

After freezing, remove the drops from the tray and store them in an airtight jar in the fridge. Why the fridge? Depending on your room temperature, the drops may start melting due to high amounts of coconut oil. It would probably be okay for me to keep them on the counter (winters in Estonia are not famous for being warm), but just to make their life a little bit longer, I’ll stick with the fridge. I might just start popping them like candy if I see them all the time :)

Raw Goji Mulberry Cupcakes

Raw goji- and mulberry cupcakes with chocolate banana frosting

If you can’t eat wheat, eggs, sugar and dairy, desserts can be tricky to come up with. I used to be addicted to baking, it was my go-to method for cheering up and relieving stress. It all changed after I got health issues and was handed a list of things I should not eat. Looking at recipes is frustrating if you keep finding things you can’t have.

This is why I was so happy when I went to visit my friends in Finland and they offered to make me some raw cakes. I had been looking at photos of awesome food in their blog and wondering what do raw cakes taste like. As I found out, they can be really delicious! And what’s even better, I had no pain after eating! The next day I really wanted to make these cupcakes myself, but I had no avocados for the frosting. So I used their recipe as inspiration and used the ingredients that I had at hand and could eat. Instead of raw goji- and mulberry cupcakes with salted chocolate frosting, I made up my own version:

Raw goji- and mulberry cupcakes with chocolate banana frosting

Cupcakes (makes four pieces):
105 g almonds
65 g dates
25 g sunflower seeds
30 g goji- and mulberries (plus some for decorating later)
2 tsp agave nectar
Raw Goji Mulberry Cupcakes

Put almonds, sunflower seeds, dates and agave syrup in a blender or a food processor. Process them until they start to stick together. You may need to stop and scrape the crumbs down a few times to make sure everything gets processed properly.

Raw Goji Mulberry Cupcakes

Add berries and turn the blender on again. Continue processing until you have them in the size you wish. Some slightly bigger chunks are nice, they add colour to the cupcakes.

Raw Goji Mulberry Cupcakes

Once everything is nicely  crumbly and sticky, scoop the mixture out. This is the base of your cupcakes, so get out your muffin pan or separate forms. I used separate silicone forms to make getting the cakes out a bit easier.

Raw Goji Mulberry Cupcakes

You have to press the mixture down quite hard so the cupcakes won’t fall apart later. The recipe said this would be enough for four cupcakes, but I decided to make mine a bit thinner and distributed the mixture between five instead. Put the pan / forms in the freezer for around half an hour while you make the frosting.

Frosting:
2 bananas
1.5 tbsp cacao butter (it was around 15 g)
2 tbsp cacao powder
1 tbsp coconut oil
1 tsp agave syrup
Raw Goji Mulberry Cupcakes

Melt the cacao butter in a water bath. (Boiling or near-boiling water in a bigger bowl, cacao butter in a smaller one. Make sure not to get any water in the smaller bowl!) Chop up the bananas and put all the ingredients in the blender. To be honest, after making it I realised it would probably be better to add the cacao powder a bit later so it doesn’t clump up on the sides of the blender.

Raw Goji Mulberry Cupcakes

Blend everything together until it’s smooth and creamy. You’ll need to cool it down a bit now so you could pipe it on the cupcakes. I spooned it into a piping bag, having first fastened the bag above the nozzle with an elastic band so the frosting didn’t drip out. Then I put it in the fridge until the mixture was solid enough. In hindsight, I could have kept it in for even longer to have more defined lines on the frosting.

Raw Goji Mulberry Cupcakes

Pipe the mixture onto the cupcakes, decorate with some berries. You can either enjoy them immediately or put them back in the fridge to wait for guests. I recommend taking them out 10-15 minutes before you want to eat – otherwise the bottom of the cupcake might be a bit too solid. Or of course you can dig into them immediately with a nice sharp fork :) Enjoy!

Almond Butter

Homemade Almond Butter

Making desserts is tricky if you’re not allowed to use eggs, sugar, wheat flour nor any dairy products. Fortunately I have already found some alternatives, but a lot of them require “nut butter of your choice”. Since my only allowed nuts for now are almonds, it wasn’t too difficult to choose what to make. My first attempt had quite nice results, so I invited a friend over to make another batch together – I wanted her to witness the magic of turning just plain nuts into something so wonderfully creamy. Unfortunately I missed one step and ended up with kind of damp crumbs that refused to turn into butter. I tried again today and fortunately everything worked like a charm!

So, gather your nuts of choice (you really don’t have to make almond butter if you’re a fan of hazelnuts for example) and get ready for this one-ingredient recipe!

Almonds

I took a cup of almonds and decided to add a small handful of sunflower seeds just because I can. Take whichever nuts you prefer and then prepare a baking pan for a short roasting. Put some baking paper on the pan, spread the nuts and/or seeds and put them in the oven for about 12-15 minutes at 130°C (266°F).

Roasted almonds and sunflower seeds

You can stir them once or twice if they start getting too brown on top. I shook them around once, just in case. Once they’re out of the oven, give them five minutes to cool down. Don’t stretch the wait much longer than that!

AlmondButter-3

Plop the slightly cooled nuts in a blender (or a food processor). They should not burn your hands anymore, but also not be entirely cool yet. Them being a bit warm really helps the process along. When I screwed up the previous attempt, roasting was the step I skipped. Unfortunately my blender cannot handle making nut butter without that step. Also, the blender has to be kind of powerful to handle processing nuts without overheating like mad. I alternated between highest and second highest speeds.

AlmondButter-4

Very quickly, the nuts should turn into dry powder. Congratulations, the first step is done! Peek in and enjoy the smell of roasted nuts. Also, grab your rubber spatula or some other nice utensil and push the crumbs down a bit. There’s no use in processing them if half the nuts are climbing up the walls. You’ll probably have to stop, push the mixture down and restart a lot of times, if your food processor works similarly to mine.

Almond Butter

Keep on processing and your nut crumbs should soon start clumping up a little bit. See those tiny balls of crumbs on top? That is very good, keep on going. Take care of your blender / food processor though, don’t let it overheat! It’s completely normal for the bowl to feel warm, you did put things from the oven in it and the blender is warming them a bit as well. It is not good however if the rest of the machine starts feeling heated and/or there’s a burning smell in the air. Just give your machine a bit of a rest and then continue.

Almond Butter

Getting to this step will take time, but in about 7-8 minutes from when I started, the crumbly mess started looking like this. That means the processor is finally getting some oils out of the nuts.

Almond Butter

At some point I started pouring/scraping the mixture out of my blender to break the bigger pieces apart and shake it around a bit. Otherwise the more damp crumbs kept gathering on the bottom and getting oils whipped out of them while the rest stayed dry on top. This step may not be necessary a different machine, but for mine it really helped.

Almond Butter

This is the part where I started to get really excited. It’s looking like nut butter! It’s all damp and the processor is actually swirling it all around instead of keeping the oilier parts on the bottom and shoving dry crumbs up. This is not the end yet though, keep on going!

Almond Butter

THIS is where you can stop. It’s all wonderfully liquid and the blender keeps pulsing half the mixture up the walls in splashes. If you wish to add any flavour, do it now. I wanted to add a bit of sea salt and perhaps a little bit of sweetener (maple syrup or agave syrup, since I’m not allowed to have cane sugar). Unfortunately I was way too excited that everything turned out the way I wanted it to, so I completely forgot about that step. I just scooped everything into a jar and danced around with joy.

Almond Butter

And there you have it. Beautiful homemade almond butter. I can guarantee you that this is better than what you could buy in a shop – you know exactly what is in it and you can flavour it however you wish. Want vanilla butter? Chuck in some powdered vanilla bean! Want a chocolatey one? Add cocoa powder! Need it to be sweeter? Bring out your awesome syrups (or just use sugar if that’s what you like). Go ahead and give it a go! (And let me know how it worked for you :))

Jerusalem Artichoke Crisps

Jerusalem artichoke crisps

Since the previous snack experiment went well and the sweet potato crisps pretty much got devoured the same evening, I decided to give it a go with some other vegetables. I happened to have a kilo of Jerusalem artichokes around and assumed they would make lovely crispy treats as well. The name in English was a surprise to me, I expected it to be something similar to the Estonian one. To us, these bumpy little roots are “earth pears” (maapirn), and apparently the Dutch have the same principle for naming them (aardpeer). But no, English has to be special yet again. It’s like that pineapple saga where most countries named it something like ananas and in English it’s the nonsensical pineapple instead.

Anyway, enough of the name. The only thing you really need to remember about Jerusalem artichokes is that they are awesome. They are not starchy like potatoes, so at least for me they seem quite a bit lighter on the stomach. They get a delightful light nutty taste when baked and they’re even good when eaten raw! That last part depends on your luck though – I’ve had amazing light and crunchy ones and also some that tasted like I was eating dirt. Let’s assume you have the good kind. Onwards to the recipe!

Jerusalem Artichokes

Grab your muddy little Jerusalem artichokes and give them a good scrub. Since I knew exactly where mine were from (grandma’s garden), how they were grown (they decided to grow on their own) and how many chemicals had been used to grow these (none), I didn’t bother with peeling. They are incredibly annoying to peel anyway due to their bumpy texture. So if you’re certain yours are nice little eco-roots, just wash them properly with a dish brush and set them aside. You may need to cut off bigger “branches” so you can get the parts between these and the main root clean as well.

Jerusalem Artichoke Crisps

Once you’re done with washing, make the coating mixture (this was enough for my kilo of slices):
2 tbsp oil (I used olive oil, but I assume they would be lovely with coconut oil as well!)
1 tbsp lemon juice
salt
herbs

The lemon juice gives a nice taste and keeps the crisps from turning too brown from contact with air. For herbs, I used a dried mixture of rosemary, basil, thyme and oregano. Feel free to add some pepper as well, if that’s to your liking. Mix this together and be ready to spoon this on the slices you’ll be making in the next step.

Jerusalem Artichoke Crisps

Now start slicing. Since I have no slicer thin enough (they have to be superthin to turn out crispy!), I used a potato peeler. Sat there for two hours slicing that kilo of roots. That’s okay though, since I had put a good TV-series on. Instead of just killing time and watching something, I was actually doing something useful at the same time!

Jerusalem Artichoke Crisps

This is the peeler I used. I’ve tried several different ones, but so far nothing has beaten this wonderful peeler from Victorinox. My boyfriend can’t use it since he is left-handed, so he uses some kind of a death contraption that all Dutch people are used to. I never warmed up to his weird peeling utensil (it moves around while peeling!), so I’m staying true to my choice.

Every now and then spoon some oil and lemon mixture in the bowl of slices. You can stir as well to distribute it more evenly, but since Jerusalem artichokes are so crunchy and break stupidly easily when sliced, you may end up with a bunch of little broken off slice tips. The more evenly you spread the mixture, the less they will turn brown though… so find your own balance for that. I chose to do some gentle stirring once there was a bigger pile of slices.

Jerusalem Artichoke Crisps

Everything is sliced? Great, but don’t rest your tired hands yet. Take all the baking pans you have and cover them with a sheet of baking paper. Now comes the fun part – dig into the bowl, grab a handful of oily slices and start placing them on your baking pan. Put them as close to each other as possible – they shrink like mad. I ended up covering six pans (I have only three, so I had to finish one batch and refill the pans). Had I put them more apart, six pans would not have been enough. While doing this, just hope nobody calls you. It’s kind of difficult to pick up the phone if you’re oily up to your elbows. I had to do a mad dash to the sink and lather everything in soap twice to get to the phone.

Jerusalem Artichoke Crisps

I put my crisps in a 130°C (266°F) oven for 15 minutes at first and then kept checking up on them every five minutes. Tiny crisps will be done quite fast, so be ready to take a pan out at a random time to pick crispy ones off and pluck them in a bowl / your mouth. Once you’re done with that pan and put it back in, some on another pan are probably ready so you can continue with that. Bigger ones took up to 25 minutes for me. To make sure you won’t forget the oven and turn your awesome crisps into thin coal slices, I recommend just sitting next to the oven with a timer and a book.

Jerusalem Artichoke Crisps

Following my boyfriend’s advice, I also made some with paprika powder and another pan with oven potato flavouring. He’s been very supportive with my quest for new healthy foods, so I was happy to make some stuff specially for him. These are better and healthier than potato crisps from the store anyway!

Jerusalem Artichoke Crisps

All done! Enjoy the crispy goodness and then go out to get more veggies for snacks – don’t expect to have anything left for the next day! (Unless you’re sneaky like me and pack two boxes away in the back of a shelf immediately.)

VVLPButton1-300pxI submitted this recipe to the Virtual Vegan Potluck to share it with more people and find some new recipes myself as well!

Sweet Potato Crisps

Sweet potato crisps

Imagine a normal evening. You’re a bit tired and a bit peckish and you do not want a proper meal just yet. Actually, you’re craving some nice crisps (or chips for you USA folk), but hey – the new diet your doctor gave you has a strict “No crisps!” rule. Alright, that goes for store-bought things. But what about some lovely homemade crisps? That way you know exactly what goes in them and how are they made!

So I looked up a nice recipe from My Whole Food Life and made my own damn crisps out of the sweet potato I had chilling in out my fridge. Take that, diet! For the original recipe, click on the link. To see how it worked for me, read on.

1 sweet potato
1 tbsp coconut oil
sea salt (I used Himalayan salt instead)

Slice up the sweet potato. This first step took me 45 minutes since I was cutting it with a small sharp knife and tried to get as thin slices as possible. The smaller the slices, the crispier the result! Place the slices on a baking pan that is covered with baking paper. Put the slices as close to each other as possible! They will shrink a lot during baking and you’ll just waste space by placing them far apart.

Sweet Potato Crisps

Then warm up your coconut oil – I just put it in a small ramekin and placed that in a bigger bowl with near-boiling water. Take care not to let any water in your ramekin! Coconut oil should melt really fast and then you can take a brush to quickly apply a bit of oil to every crisp. Then sprinkle some salt on top and the crisps are ready for the oven! You may have to take breaks from applying oil and put salt on inbetween – since the crisps are at room temperature, coconut oil will solidify again unless your kitchen is really warm.

All brushing done, warm your oven to 100°C (around 215°F) and put the crisps in for around 2h. Check the oven frequently! Once some crisps are already nicely dried and crispy, remove them. It will take some more time than removing everything at the same time, but at least all your crisps will be equally baked and lovely. Especially if you sliced the sweet potato by hand, the crisps will be a bit uneven and get ready at different times.

Sweet Potato Crisps

Enjoy!